Showing posts with label tutorial. Show all posts

Monday, February 16, 2026

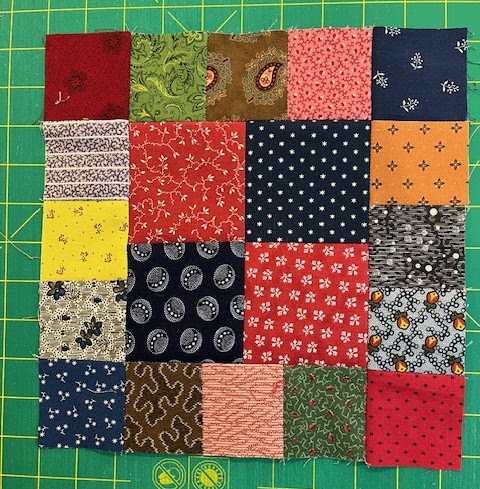
Broken Dishes block, in 30's repro fabric

 Good day, and welcome to my blog.

I am away from home on a business trip, but I brought my computer with me, so that I can blog on my usual Monday morning. (and do business work)

When I am in between large projects, I often pull out a small ongoing project of Broken Dishes blocks (also called the Envelope pattern).  

I have pre-cut fabric squares (3 inches) and unbleached muslin squares. Two of each to start.


(OK I had sewn my green squares together by the time I thought of showing my process in a blog post.)

Draw a diagonal line as you see here on the back of the light fabric.  Sew a scant 1/4 inch away from the drawn line, first on one side, then the other.  Cut along the drawn line.


Press open, seams towards the darker fabric.  Arrange half square triangles as in the photo above.  Sewn top and bottom pieces into twosies.


Press again towards darker fabric.  Now pin and sew these two pieces together.  Pins will help keep that center intersection in the right place, but seams should nest nicely.


Because I started with 3 inch fabric squares (not 2 and 7/8, not 3 and 7/8) my final blocks are ending up at an odd size.  This doesn't matter, as long as I keep a steady seam allowance width and all blocks end up the same size.

Note I haven't cut off the dog ears.  If this becomes important later, I will do so.
  
I have a pile of these blocks now.  But they are small (less than 5 inches square) so it will take quite a few to make a reasonably sized quilt.

Linking up with Monday Musings, Sew and Tell at Melva Loves Scraps, Wednesday Wait Loss (she featured my Shadowpoint quilt, thank you!), Needle and Thread Thursday, Put your Foot Down at the Quiltery, Nina-Marie, Finished or Not at Alycia Quilts, From Bolt to Beauty, Frederique at Quilting, Patchwork, Applique, Oh Scrap at Quilting is more Fun than Housework.

I have a page on Facebook: keep up with my infrequent quilt and stamp posts at https://www.facebook.com/pages/Viridian61/347674418583948?ref=hl

Viridian

Monday, June 23, 2025

Viridian's Chain quilt pattern: a tutorial

After asking a quilt list and my followers here about a pattern I came up with, no one seems to recognize it as a published pattern.  What follows is a tutorial for Viridian's Chain, a 10 inch block:


With sashing and cornerstones that connect the chains.  Here is what the quilt top looks like on my 'design floor', 5 by 6 blocks, without borders:


Here we go.

Pick two colors, color A and color B, to be your chain fabrics.  It can be scrappy, but the fabrics should be quite similar.  I used 1800's reproduction fabrics (a favorite) and red and navy blue as my color A and color B.  Different choices will make the chain 'pop' more.

For each block, you need: 2 3.5 inch squares of color A, 2 3.5 inch squares of color B, 2 2.5 inch squares of color A, 2 2.5 inch squares of color B, and 12 2.5 inch squares of coordinating scrap fabrics.


Sew the central 4 patch squares together.  Press to one side to help nest those central seams.  I pressed towards the blue fabrics.

Sew the coordinating scrap fabrics together in groups of three.  Press seams to either side or open, your choice.  Lay out your patches as in the photo below.


Important:  The direction of the chain of color A and color B fabrics is going to be the same in each block.  In my case, navy blue fabrics run from lower left to upper right in EACH block.

Sew a group of three scrap fabrics to the top and bottom of the block.  Sew color A and color B 2.5 inch squares to the ends of the other group of three 2.5 inch squares.


Sew the sides pieces onto the center piece.  Press the seams inward or outward.  I pressed out to the strip of 5 square pieces.

You now have one block.


Setting with sashing and cornerstones:

Cut sashing pieces 2.5 inches wide by 10.5 inches long.  For 5 by 6 blocks, I calculate 71 sashing pieces, and you will need at least a yard of sashing fabric, maybe 1.5 yards.

Cornerstones:  From color A and color B cut 1.5 inch strips of fabric, sew one of color A to one of color B.  Press to one side (in my case to the navy blue).  Cut off pairs at 1.5 inches wide.  Or you could cut individual squares at 1.5 inches square.


You need to have cornerstone blocks that finish at 2 inches square, and by my calculations, for a set of 5 by 6 blocks you will need 42 cornerstone blocks.

Set the sashing strips and the cornerstone blocks in the proper orientation.


Note the orientation of the cornerstone block, how it continues the chain of color A and color B.  I sewed a sashing strip to the right side of each block first. Press towards the sashing fabric. Then I sewed a cornerstone block to a sashing strip, and added it to the top of the block.  Press seams towards the sashing here too.  All cornerstone blocks are in the same orientation (no rotations!).  When you set the blocks together, keep the same orientation - that is, the same color runs from lower left to upper right.

When you set the blocks together in rows and columns all sashing will be in place, except for the bottom and left-hand side of the quilt.  You will have to add these - watching for the orientation of that cornerstone block.

Here are two blocks together:


And four blocks together:


This group of four blocks became the lower left corner of my quilt top. Note how the cornerstone blocks are all in the same orientation. And how the chains of color A and color B are oriented.

The whole quilt top, again:


The size of the top now is 62 inches by 74 inches.  I am adding borders of the red fabric first, 1.5 inches wide, finished.  Then borders of a blue fabric, 3 inches wide, finished.  I wish it could be a little wider but I am limited by what I have in my stash - I didn't want to buy any more fabric.

I will update this blog entry with a photo of the border, once I get there!

Edited Monday evening:  Here is a corner of the finished top. with red and blue borders:


Linking up with Monday Musings, Sew and Tell at Melva Loves Scraps, Wednesday Wait Loss, Needle and Thread Thursday, Put your Foot Down at the Quiltery, Nina-Marie, Finished or Not at Alycia Quilts, From Bolt to Beauty, Oh Scrap at Quilting is more Fun than Housework.

I have a page on Facebook: keep up with my infrequent quilt and stamp posts at https://www.facebook.com/pages/Viridian61/347674418583948?ref=hl

Viridian

Tuesday, February 5, 2013

Tuesday quilt block Feb. 5

It's Feb. 5 and time for a short tutorial on the block H-6, Pie Sale, which I promised last week.

The idea of piecing or appliqueing all those quarter circles made me tremble, so I came up with a different way, which I thought was new.  Of course when it comes to quilts in the style of Jane Stickle someone has tried this method before.

Anyhow, I pieced the center block of focus fabric surrounded by background fabric, following the measurement in The Book, and four 4-patches the size of the quarter circles plus 1/4 inch seam allowances. (Sorry, I did not write down my actual measurements.).


I then prepared my 4 patches into circles for applique.  I use freezer paper on the bottom and fold over the seam allowances and crease them with a hot iron.  I then baste down the seam allowances to hold them in place while I applique.  You may use your own method.


Carefully pinning or basting in place to match the block in the Mother quilt, applique around the circles, remove basting stitches and freezer paper if any, and press.


Well, I thought I was doing a "new" method for this block.  However doing some web searching for images of the actual block in the Mother Quilt in the Bennington Museum, I came across the blog Connie's Quilts and her entry on reproducing this quilt block.  And yes, she used the same method, over 2 years ago.  Connie, are you still out there?  Are you going to continue your reproduction Jane Stickle project?

I am linking up with Connie at Freemotion by the River as I do most weeks I have blocks to share. Both blog hops have of pictures of pretty quilt blocks and other projects.

I am on Facebook too: just search for Viridian61. I post only when I have put up a blog post, and very little else.

Viridian


Pin It

Tuesday, July 13, 2010

Tutorial: Half-square triangles

If you are interested in making a Perkiomen Valley quilt, you'll need a goodly number of these triangles.  And for that scrappy look, you will want these triangles in a variety of pairings of light and dark fabrics.

A top option is using Thangles, in the proper size for the block you are planning.  If you don't have these, try the method I show below.  It may be familiar to you, but maybe not.

Step 1: Cut squares of light and dark fabrics the proper size.  What is the proper size?  The size of your finished square plus 7/8 inches.  For my project, each square finishes at 1 inch, so I cut my squares 1 and 7/8 inches on a side.  For a finished measurement of 1.5 inches, cut your squares 2 and 3/8 inches in size.

Step 2: Draw a diagonal line on your light colored square of fabric.  Take a dark fabric, right side up, and place a light square, right side down, on top of it, all corners aligned.  See the photo below.


Step 3: Sew 1/4 inch to the left of the diagonal line on your light fabric.  Use your 1/4 inch presser foot if you have one.  See photo above.  You can chain piece a number of these.


Step 4: Take the squares out, turn them around, and sew down 1/4 inch away from the diagonal line, on the other side.  See the photo above - sorry can't see my thread too well!


Step 5:  Cut along the diagonal line with a rotary cutter and a ruler. Here I took the photo of the back.


Step 6: Press open, carefully.  It's easy to stretch these along the bias of the fabric.  Measure.  If your target finished size is 1 inch, the unfinished size of these units should be 1.5 inches squares.  Check to see.

OK!  I hope to put one more post up before a break, we'll see.  Stay tuned for instructions on sewing and assembling Perkiomen Valley quilt blocks.

Viridian
Related Posts with Thumbnails